Checkmate with a
Queen & Rook
Finish your games strong with this checkmating pattern.
What We’ll Cover
An advanced look at checkmate
The 4 steps to checkmate with a Queen and Rook
Why it Matters
Every checkmating pattern you learn is one extra tool in your toolbelt. The more tools you have, the more games you win.
A Closer Look at Checkmate
Let’s talk about royal squares.
Royal squares are all the immediate squares around a King, including the square the King is on.
If you want to win your games with checkmate, you need to make sure all of these squares work in your favor.
Here’s exactly what to look for:
Safe royal squares (not good for you)
Ask: Does the King I’m trying to checkmate have safe squares they could move to if I checked them with a piece?
If so, move your pieces to attack those squares.
Blocked royal squares (good for you)
Ask: Are the royal squares blocked by their own color pieces? If so, those are squares that their King can’t move to if threatened. That’s good.
Note- It’s okay to have your pieces on royal squares as long as they’re defended by your other pieces. That way they can’t be captured and serve as escape squares.
Once you know all the royal squares are accounted for, you’re able to deliver the final blow.
4 Checkmate Steps
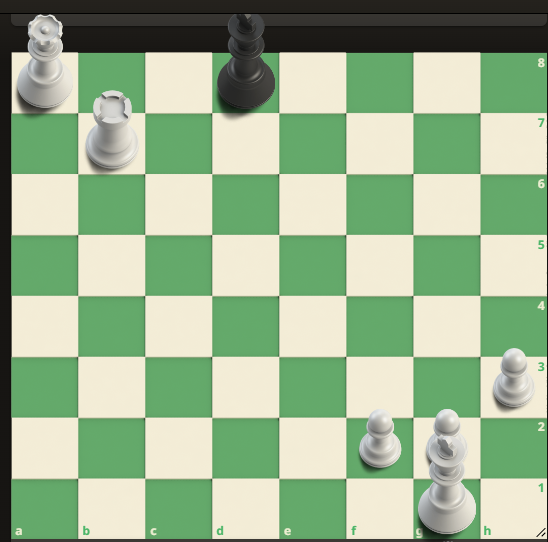
Checkmating with a Queen and a Rook can be done in 4 steps.
Check out the King in the picture.
In order to checkmate in the middle of the board, we need to control 9 royal squares.
That’s a lot. And it’s the reason why most checkmates happen on an edge. It’s much easier to control 4 or 6 squares on an edge than 9 in the middle.
Which brings us to our steps.
1️⃣ Limit Movement
We need to force this King towards an edge for an easier win. To do that we move the Queen just before the row (rank) the King is in.
This stops the King from running around the middle, where it’s harder to deliver checkmate.
2️⃣Force to an edge
Now that we stopped the King from traveling past the line the Queen attacks, we’re going to bring our rook one step ahead of our Queen.
This forces the King towards the edge of the board. They’re sweating now.
We’ll walk the Queen and Rook down the board until the King is at the edge with no options.
Make sure you don’t leave a gap for the King to run back to the center. Keep the Queen and Rook controlling two rows at a time.
3️⃣Stay safe
Sometimes your opponent will try and attack your Rook.
In this position the Rook is defended by our Queen, so there’s no danger, but you’ll want to make sure you stay focused so you don’t lose a piece. Keep those pieces safe.
4️⃣Checkmate
Once the King is on the edge you’ll have delivered checkmate.
The King here is:
- being checked by the Queen
- has no safe squares to run to
- has no pieces that can block the check (getting in between the King and the Queen attack).
- has no pieces that can capture the checking piece (Queen)
So this is checkmate! Victory!
Action Step
Practice the Queen and Rook checkmating pattern on an online or physical board. Mix up walking the King up the board, to the left, right, and bottom of the board.
Once you’re comfortable with the movement you’ll have one more weapon in your games.
Wrap Up
Now you know that if you have a Queen and Rook you’re more than able to deliver checkmate to your chess opponents.
May your pieces strike fear in the hearts of those who oppose you. 😄
If you want a free chess guide that gives you a plan for the start of your games, you can download that below.
Happy playing, friend.


